Kings 40A DCDC Charger Manual: A Comprehensive Guide
This detailed manual expertly guides users through the Kings 40A DCDC Charger’s features, installation, and optimal performance,
ensuring efficient auxiliary battery charging from your vehicle’s alternator and solar panels.
The Kings 40A DCDC Charger is a robust power solution designed for adventurers and off-grid enthusiasts. This versatile device efficiently charges auxiliary or house batteries directly from your vehicle’s alternator, ensuring a reliable power source for camping, 4WD adventures, and various applications. Beyond alternator charging, it boasts a built-in, high-efficiency MPPT (Maximum Power Point Tracking) Solar Regulator, maximizing energy harvest from solar panels – a minimum 30W input is required for this functionality.
Compatible with both 12V and 24V input systems, and specifically Lithium batteries, the Kings 40A DCDC Charger offers flexibility and convenience. Its IP66 rating provides excellent protection against dust and water, making it suitable for harsh environmental conditions. This manual serves as a comprehensive guide, covering installation, operation, troubleshooting, and warranty information, empowering you to unlock the full potential of your Kings 40A DCDC Charger.
Key Features and Specifications
The Kings 40A DCDC Charger stands out with its integrated MPPT Solar Regulator, intelligently tracking the maximum power point of connected solar panels (minimum 30W input). It’s designed for 12V and 24V input systems, offering broad vehicle compatibility. Lithium battery compatibility ensures modern battery technology is fully supported, alongside traditional lead-acid options.

Key features include quick connect plugs for simplified installation and an IP66 rating, guaranteeing dust and water resistance. The charger delivers a consistent 40A output, rapidly replenishing auxiliary batteries. Specifications include a wide input voltage range and multiple safety protections. User-adjustable charging parameters allow customization for specific battery types. This charger is a reliable and efficient power solution for any adventure, backed by a comprehensive warranty and dedicated customer support.

Installation Guide
Proper installation is crucial for optimal performance and safety; this section details the necessary steps, from safety precautions to wiring diagrams and secure mounting procedures.
Safety Precautions Before Installation
Before commencing installation of your Kings 40A DCDC Charger, prioritize safety to prevent damage or injury. Disconnect the negative terminal of your vehicle’s battery to avoid accidental shorts during wiring. Ensure the installation area is clean, dry, and well-ventilated, free from flammable materials.
Always wear appropriate personal protective equipment (PPE), including safety glasses and insulated gloves. Verify the charger’s voltage settings match your battery system (12V or 24V) before connecting. Double-check all wiring connections for tightness and correct polarity – reverse polarity can cause severe damage.
Never work on the electrical system while the engine is running. If unsure about any aspect of the installation, consult a qualified automotive electrician. Improper installation voids the warranty and may create a fire hazard. Keep this manual readily available for future reference and maintenance.
Wiring Diagram and Connections
The Kings 40A DCDC Charger requires careful wiring for optimal performance and safety. Connect the positive (+) and negative (-) wires from the vehicle’s alternator to the corresponding terminals on the charger. Utilize appropriately sized wiring – consult the manual for recommended gauge based on cable length.
Connect the charger’s output terminals to the auxiliary battery, again observing correct polarity. A fuse should be installed as close as possible to the auxiliary battery’s positive terminal for circuit protection.
For MPPT solar regulator functionality, connect a solar panel (minimum 30W) to the designated solar input terminals, ensuring correct polarity. Refer to the detailed wiring diagram included in the full manual for specific terminal locations and connection sequences. Secure all connections tightly to prevent voltage drop and potential hazards.
Mounting the Charger
Proper mounting of the Kings 40A DCDC Charger is crucial for both functionality and longevity. Select a location that is dry, well-ventilated, and protected from extreme temperatures and direct water exposure, leveraging its IP66 rating for resilience.
Ensure the mounting surface is solid and capable of supporting the charger’s weight. Use appropriate mounting hardware (not always included) suitable for the surface material.
Maintain adequate clearance around the charger for airflow, preventing overheating. Avoid mounting near flammable materials or areas where the unit could be easily damaged. Securely fasten the charger to prevent movement during vehicle operation, ensuring all connections remain stable and protected.
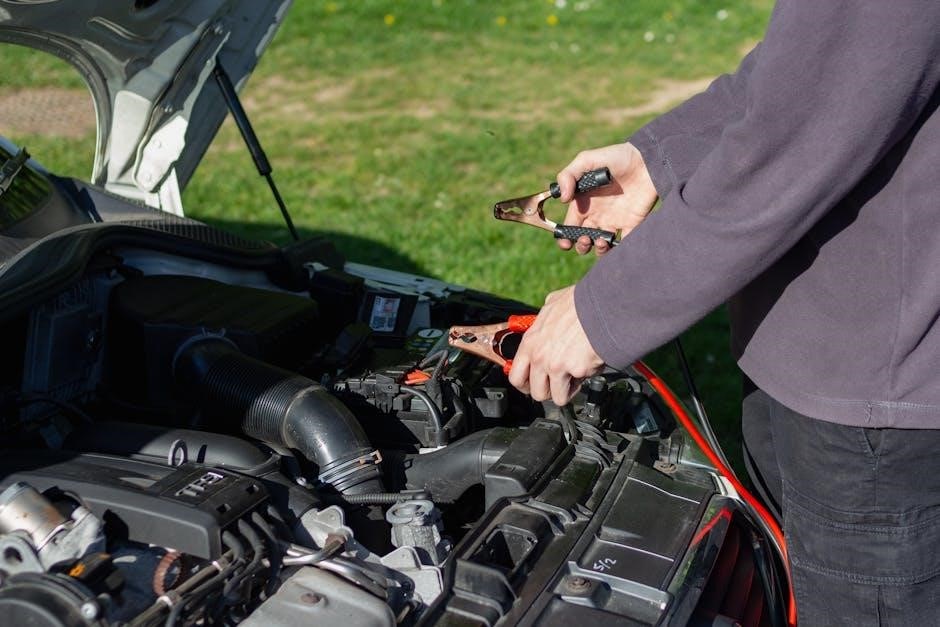
Connecting to the Vehicle’s Alternator
Connecting the Kings 40A DCDC Charger to your vehicle’s alternator requires careful attention to wiring and safety. Identify the positive (+) and negative (-) terminals on both the alternator and the charger. Use appropriately sized, high-quality wiring – consult a qualified auto electrician if unsure.
Always disconnect the vehicle’s negative battery terminal before commencing any wiring. Connect the positive wire from the charger to the alternator’s positive terminal, and the negative wire to a suitable chassis ground point near the alternator.
Ensure all connections are secure and insulated to prevent shorts. Double-check polarity before reconnecting the vehicle’s battery, minimizing the risk of damage to the charger or vehicle’s electrical system.
Connecting to the Auxiliary Battery

Properly connecting the Kings 40A DCDC Charger to your auxiliary battery is crucial for safe and efficient charging. First, ensure the auxiliary battery is of the correct voltage (12V or 24V, matching the charger’s setting). Identify the battery’s positive (+) and negative (-) terminals.
Using appropriately sized cable, connect the positive wire from the charger to the auxiliary battery’s positive terminal, and the negative wire to the negative terminal. Securely tighten all connections to prevent loosening due to vibration.
Always double-check polarity before fully tightening the connections. Incorrect polarity can cause severe damage to the charger and battery. Consider using a fuse near the battery for added protection.
MPPT Solar Regulator Functionality
The Kings 40A DCDC Charger boasts a built-in, high-efficiency MPPT Solar Regulator, maximizing power from solar panels with a minimum 30W input.
Understanding MPPT Technology
Maximum Power Point Tracking (MPPT) is a sophisticated charging technology utilized within the Kings 40A DCDC Charger to dramatically enhance solar charging efficiency. Unlike traditional PWM (Pulse Width Modulation) controllers, MPPT actively seeks the optimal voltage and current combination from your solar panel array.
This “maximum power point” varies based on factors like sunlight intensity, panel temperature, and load demand. The MPPT regulator continuously adjusts its operation to extract the most power possible, even under suboptimal conditions;
Essentially, MPPT converts excess voltage from the solar panel into increased current, delivering more power to the auxiliary battery. This results in faster charging times, particularly in cooler weather or when panels aren’t perfectly aligned with the sun. The integrated MPPT functionality ensures you harness the full potential of your solar investment, maximizing energy capture and battery life.
Minimum Solar Panel Input Requirements (30W)
To effectively utilize the built-in MPPT Solar Regulator within the Kings 40A DCDC Charger, a minimum solar panel input of 30 watts is required. This specification ensures the charger can reliably detect and track the maximum power point, initiating and maintaining a stable charging cycle.
Panels below this wattage may not generate sufficient voltage or current for the MPPT algorithm to function optimally, potentially resulting in no charging or intermittent performance.
It’s crucial to verify your solar panel’s specifications before connecting it to the charger. While higher wattage panels are certainly compatible and will yield faster charging, adhering to the 30W minimum guarantees functionality. Consider voltage matching as well; the MPPT regulator efficiently handles a range of panel voltages, maximizing energy transfer.
Optimizing Solar Panel Placement

Maximizing solar energy capture is vital for efficient battery charging with your Kings 40A DCDC Charger. Prioritize unobstructed sunlight exposure throughout the day; avoid shading from trees, buildings, or even other vehicle components.
Panel angle significantly impacts performance. Adjust the angle seasonally to align with the sun’s path – steeper in winter, shallower in summer. A general rule is to set the angle equal to your latitude.
Consider panel orientation. Facing true south (in the Northern Hemisphere) yields the most consistent sunlight. Regularly clean the panel surface to remove dust, dirt, and debris, ensuring optimal light absorption. Proper placement dramatically improves charging efficiency and reduces charging times.
Charging Profiles and Settings
The Kings 40A DCDC Charger offers adaptable charging profiles, supporting both 12V and 24V systems, and is fully lithium battery compatible for optimized performance.
Lithium Battery Compatibility
The Kings 40A DCDC Charger is specifically engineered for seamless compatibility with lithium battery systems, a crucial feature for modern auxiliary power setups. Unlike traditional chargers, this unit recognizes the unique charging requirements of lithium iron phosphate (LiFePO4) batteries, preventing overcharging and maximizing battery lifespan;
Proper configuration is essential. Users must select the appropriate lithium charging profile within the charger’s settings menu. Failure to do so may result in reduced battery performance or, in rare cases, damage. The charger supports various lithium battery capacities and chemistries, offering flexibility for diverse applications.
It’s important to note that lithium batteries often require a Battery Management System (BMS). Ensure your BMS is compatible with the Kings 40A DCDC Charger’s output voltage and current. Regularly check the battery’s voltage during charging to confirm proper operation and adherence to the manufacturer’s specifications.
12V and 24V Input Settings
The Kings 40A DCDC Charger boasts versatile input voltage settings, accommodating both 12V and 24V vehicle electrical systems. This adaptability makes it suitable for a wide range of vehicles, including cars, trucks, and larger commercial vehicles. Correctly configuring the input voltage is paramount for optimal performance and preventing damage to the charger or the vehicle’s electrical system.
Before installation, carefully verify your vehicle’s operating voltage. The charger features a dedicated switch or menu option to select between 12V and 24V input. Incorrect selection can lead to inefficient charging or, in severe cases, component failure.
Always disconnect the charger from the battery before changing the input voltage setting. Refer to the detailed wiring diagram in this manual to ensure proper connections for your chosen voltage. Double-check all connections before powering on the system.
Adjusting Charging Parameters
The Kings 40A DCDC Charger allows for customizable charging parameters to optimize battery health and lifespan. These settings are crucial for tailoring the charging process to specific battery types, including AGM, Gel, and Lithium. Accessing these parameters is typically done through a user-friendly interface, often involving button combinations or a connected app.
Key adjustable settings include absorption voltage, float voltage, and equalization voltage. Understanding your battery’s specifications is vital before making adjustments. Incorrect settings can lead to undercharging, overcharging, or reduced battery capacity.
Lithium battery compatibility requires specific settings; ensure the charger is configured for the correct lithium profile. Regularly review and adjust these parameters based on battery usage and environmental conditions for peak performance.

Troubleshooting Common Issues
This section provides solutions for typical problems like charger not recognizing the battery, low voltage output, and overheating, ensuring optimal functionality.
Charger Not Recognizing Battery
If the Kings 40A DCDC Charger fails to recognize the connected battery, several factors could be at play. First, meticulously verify all wiring connections between the charger, auxiliary battery, and vehicle’s electrical system, ensuring polarity is correct – positive to positive, negative to negative. A reversed connection can prevent recognition and potentially damage the unit.
Next, confirm the battery voltage is within the charger’s acceptable input range. Severely discharged batteries might fall below this threshold. Attempt to briefly charge the battery with an alternative method to bring it up to a recognizable voltage level. Inspect the battery terminals for corrosion or debris, as this can impede a proper connection.
Also, check the charger’s settings to ensure the correct battery type (Lithium, AGM, Gel, etc;) is selected. An incorrect profile can prevent the charger from initiating the charging process. Finally, if the issue persists, consult the full user manual for advanced troubleshooting steps or contact customer support for assistance.
Low Charging Voltage
Experiencing a low charging voltage with your Kings 40A DCDC Charger indicates a potential issue within the charging circuit or connected system. Initially, assess the vehicle’s alternator output voltage while the engine is running; it should ideally be between 13.8V and 14.4V. A low alternator voltage directly impacts the charger’s ability to deliver sufficient power.
Inspect the wiring for any voltage drops, particularly along longer cable runs. Use a multimeter to measure voltage at various points to identify potential restrictions. Confirm the correct 12V or 24V input setting is selected on the charger, matching your vehicle’s electrical system.
Verify the auxiliary battery’s condition; a failing battery may struggle to accept a full charge. Finally, review the selected charging profile for the battery type, ensuring it’s appropriately configured for optimal charging performance; If the problem continues, consult the manual or contact support.
Overheating Issues
If your Kings 40A DCDC Charger is overheating, immediately investigate the cause to prevent potential damage or safety hazards. Adequate ventilation is crucial; ensure the charger isn’t enclosed in a confined space restricting airflow. Confirm the charger isn’t exceeding its maximum rated output current, which could lead to excessive heat generation.
Inspect the mounting location for obstructions that might impede heat dissipation. Verify the charger is securely mounted to a metal surface acting as a heat sink; Check for any signs of corrosion or damage to internal components, potentially causing increased resistance and heat.
Ensure the ambient temperature isn’t excessively high, as this can exacerbate overheating. If the issue persists, discontinue use and consult the manual or contact customer support for assistance. Do not attempt to disassemble the unit yourself.

User Manual and Documentation
Access the comprehensive Kings 40A DCDC Charger manual in PDF format for detailed installation guides, specifications, troubleshooting, and crucial warranty details online.
Downloading the PDF Manual
Obtaining the official Kings 40A DCDC Charger PDF manual is straightforward and provides a wealth of information at your fingertips. Several online resources offer direct downloads, ensuring you have immediate access to essential documentation;
You can typically find the manual available for download from the retailer where you purchased the charger, such as Amazon.com.au or 4WD Supacentre. A quick online search for “Kings 40A DCDC Charger manual PDF” will also yield numerous results, leading you to official or verified sources.
The PDF manual contains detailed instructions covering installation procedures, wiring diagrams, charging profiles, troubleshooting steps, and warranty information. It’s highly recommended to download and review this document before beginning any installation or operation of the charger to ensure safe and optimal performance. Having the manual readily available will greatly simplify setup and address any potential issues that may arise.
Warranty Information
The Kings 40A DCDC Charger is backed by a manufacturer’s warranty, providing peace of mind and protection against potential defects. While specific warranty terms can vary depending on the retailer and region, it generally covers manufacturing faults and component failures under normal use.
It’s crucial to retain your proof of purchase – the original receipt or invoice – as this is typically required to make a warranty claim. The warranty period usually commences from the date of purchase.
The warranty typically does not cover damage resulting from misuse, improper installation, accidental damage, or modifications to the charger. Refer to the full warranty documentation (often included within the PDF manual or available from the retailer) for a comprehensive understanding of the coverage, exclusions, and claim process. Contacting customer support is the first step in initiating a warranty claim.
Contacting Customer Support
For any questions, concerns, or assistance regarding your Kings 40A DCDC Charger, reaching out to customer support is highly recommended. Several avenues are typically available to ensure you receive prompt and effective help.
Firstly, consult the comprehensive PDF manual, downloadable from the manufacturer’s website or retailer’s product page, as it often addresses frequently asked questions and common troubleshooting steps.
If further assistance is needed, most retailers offer dedicated customer support channels, including phone support, email, and sometimes live chat. Check the retailer’s website for contact details.
Directly contacting the manufacturer may also be an option, though response times can vary. Prepare your charger’s model number and proof of purchase when contacting support to expedite the process.

IP66 Rating and Environmental Protection
The Kings 40A DCDC Charger boasts an IP66 rating, signifying robust protection against dust and powerful water jets, ensuring reliable operation in harsh environments.
Understanding the IP66 Standard
The IP66 rating is a globally recognized standard defined by the International Electrotechnical Commission (IEC), indicating a device’s level of protection against solid objects and liquids. The first digit, ‘6’, represents protection against dust – meaning the charger is completely dust-tight and will not allow any ingress of dust particles that could compromise its functionality.
The second digit, ‘6’, signifies protection against powerful water jets. Specifically, it can withstand direct jets of water from any direction, equivalent to 12.5 liters per minute at a pressure of 80 Newtons per square meter. This makes the Kings 40A DCDC Charger exceptionally suitable for use in outdoor environments, off-road adventures, and conditions where exposure to water is likely.
Essentially, the IP66 rating provides assurance that the charger is sealed effectively, safeguarding its internal components from potential damage caused by environmental factors, thereby enhancing its durability and longevity.
Maintaining the Charger in Harsh Conditions
To ensure the longevity of your Kings 40A DCDC Charger when exposed to demanding environments, regular inspection is crucial. Periodically check for any physical damage to the casing, connectors, and wiring. Clean the exterior with a damp cloth to remove accumulated dust, mud, or salt spray – avoid using harsh chemicals or abrasive cleaners.
Despite its IP66 rating, prolonged submersion should be avoided. If the charger is exposed to significant water, ensure it’s thoroughly dried before resuming operation. Inspect the quick connect plugs for corrosion and clean them with a contact cleaner if necessary.
In extremely dusty conditions, consider additional protective measures like covering the charger when not in use. Proper maintenance will maximize performance and reliability, even in the toughest conditions.