Black & Decker All-in-One Bread Machine Manual: A Comprehensive Guide
This manual details operation of the Black & Decker bread machine, offering recipes and troubleshooting. It also covers features like delay timers and crust control settings.
Understanding Your Bread Machine
Your Black & Decker all-in-one bread machine is a versatile kitchen appliance designed for convenient bread baking, dough making, and even jam or cake creation. This machine automates the bread-making process, eliminating much of the manual labor traditionally involved. Familiarizing yourself with its capabilities is key to successful baking.
The machine operates by combining ingredients, kneading the dough, allowing it to rise, and then baking it – all within a single, enclosed unit. Different program settings cater to various bread types, like whole wheat, French, or sweet breads. Understanding these cycles, along with features like the delay timer and crust control, will unlock the machine’s full potential. Refer to the manual for specific program durations and recommended ingredient quantities.
Model Identification & Variations
Identifying your specific Black & Decker bread machine model is crucial for accessing the correct manual and support resources. While the core functionality remains consistent across models, variations exist in program options, capacity, and features. Common models include those with 1.5lb or 2lb loaf capacities, and differing numbers of pre-programmed cycles.
Check the appliance’s base or rear panel for a model number – this is your key identifier. Variations may include different control panel designs or the inclusion of features like a viewing window. Ensure you have the manual corresponding to your exact model number to avoid confusion regarding cycle times, ingredient recommendations, and safety instructions. Online resources often categorize manuals by model number for easy access.
Key Components & Parts Overview
Understanding the key components of your Black & Decker bread machine ensures proper operation and maintenance. The primary parts include the loaf pan, kneading paddle(s), heating element, and control panel. The loaf pan securely holds ingredients during baking, while the paddle(s) mix and knead the dough.
The heating element provides consistent heat for baking, and the control panel allows you to select desired programs and settings. Other important components are the lid with viewing window (on some models), the crumb dispenser, and the power cord. Familiarize yourself with each part’s location and function for optimal bread-making results and safe usage.
Safety Precautions & Warnings
To ensure safe operation of your Black & Decker bread machine, heed these crucial precautions. Always unplug the appliance before cleaning or when not in use. Never immerse the machine base, cord, or plug in water or other liquids. Avoid touching hot surfaces, like the loaf pan or heating element, during or immediately after baking.
Keep the appliance away from flammable materials. Ensure proper ventilation during operation. Do not operate the machine with a damaged cord or plug. Supervise children when the appliance is in use. This appliance is for household use only; avoid commercial applications. Failure to follow these warnings may result in injury or damage.

Getting Started: Initial Setup
Begin by unpacking and inspecting your bread machine. Thoroughly clean the loaf pan and kneading paddle before the first use for optimal results.
Unpacking & Inspection
Carefully remove the Black & Decker bread machine from its packaging, ensuring all components are present. Verify the inclusion of the bread machine itself, the loaf pan, the kneading paddle, and this comprehensive user manual. Inspect the appliance for any visible damage incurred during shipping – dents, scratches, or broken parts.
If damage is detected, immediately contact the retailer or Black & Decker customer support. Retain all original packaging materials for potential returns or warranty claims. Confirm that the power cord is intact and free from any cuts or fraying. Before proceeding, familiarize yourself with all included parts as detailed in the parts overview section of this manual. Proper inspection guarantees safe and efficient operation.
Cleaning Before First Use
Before operating your Black & Decker bread machine for the first time, thorough cleaning is essential. Remove the loaf pan and kneading paddle. Wash both components with warm, soapy water, ensuring all manufacturing residues are eliminated. Avoid abrasive cleaners that could damage the non-stick coating.

Wipe the exterior of the bread machine with a damp cloth. Never immerse the main unit in water or any other liquid. Ensure all parts are completely dry before reassembling. This initial cleaning process removes any potential odors or particles that may affect your first loaf. Proper preparation contributes to optimal performance and food safety.
Powering On & Basic Controls
To power on your Black & Decker bread machine, simply plug the unit into a grounded electrical outlet. The power button initiates operation. The control panel features buttons for selecting programs, adjusting crust color, and setting the delay timer. Use the “Menu” or “Program” button to cycle through available bread-making options – basic, whole wheat, French, sweet, and dough;
The “Start/Stop” button begins or halts the selected cycle. Crust control buttons typically offer light, medium, and dark settings. Familiarize yourself with these controls before your first bake. Refer to the manual for specific button functions and cycle times.

Bread Making Basics
Successful bread making relies on precise ingredient measurements and quality. Understanding yeast activation and proper ingredient order are crucial for optimal results.
Ingredient Measurement & Quality
Achieving consistent bread results hinges on accurate ingredient measurements. Always use measuring cups and spoons specifically designed for baking, ensuring level measurements. Liquid ingredients should be measured in liquid measuring cups, viewed at eye level.
The quality of ingredients significantly impacts the final product. Use fresh yeast, as expired yeast may not activate properly. Flour should be stored in an airtight container to maintain freshness.
Consider the protein content of flour; higher protein content is ideal for bread. Water temperature is also critical – typically lukewarm (around 80-85°F) for optimal yeast activation. Using high-quality ingredients will elevate the taste and texture of your homemade bread, ensuring a delightful baking experience with your Black & Decker machine.
Understanding Yeast Types
Different yeast types behave uniquely within the bread-making process. Active dry yeast requires proofing – dissolving in warm water with a bit of sugar – to confirm viability before adding to ingredients. Instant yeast, also known as bread machine yeast, can be added directly to dry ingredients, simplifying the process.
Fresh yeast, though less common, offers a distinct flavor profile. It’s crucial to understand the conversion ratios between these types; typically, 1 packet (2 ¼ teaspoons) of active dry or instant yeast equals 0.6 ounces of fresh yeast.
Your Black & Decker machine’s settings may be optimized for specific yeast types, so consult the manual. Proper yeast selection and activation are fundamental to successful bread baking, ensuring a proper rise and desirable texture.
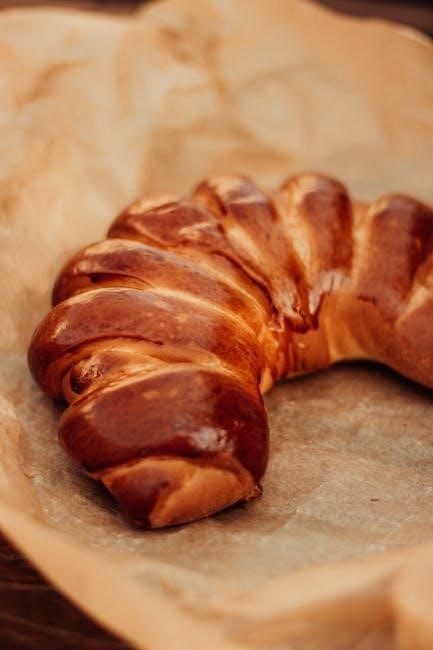
Basic Bread Recipe – White Bread
This foundational recipe showcases your Black & Decker machine’s capabilities. Combine 1 ¼ cups warm water, 3 cups bread flour, 2 tablespoons sugar, 1 ½ teaspoons salt, and 2 ¼ teaspoons instant yeast in the bread pan. Ensure ingredients are added in the order recommended by your machine’s manual for optimal mixing.
Select the “Basic” cycle and a 1.5-pound loaf size. Adjust crust color to your preference – light, medium, or dark. Monitor the initial mixing stage to ensure proper dough formation; add a tablespoon of water if too dry, or flour if too wet.
Once the cycle completes, carefully remove the loaf and allow it to cool completely before slicing and enjoying freshly baked bread!

Program Settings & Functions
Explore diverse baking options! This section details cycles for basic, whole wheat, French, sweet breads, dough, jam, and even cake, offering versatility.
Basic Bread Cycle
The Basic Bread Cycle is your starting point for delightful homemade loaves. This pre-programmed setting is ideal for traditional white bread recipes, offering a balanced kneading, rising, and baking process. Typically, this cycle lasts around 3 hours and 30 minutes, encompassing all stages of bread making automatically.
Ensure ingredients are added in the order specified in your recipe – usually liquids first, followed by dry ingredients, and finally yeast. Selecting the appropriate loaf size (1lb, 1.5lb, or 2lb) is crucial for optimal results. The machine handles the entire process, from mixing and kneading the dough to the final baking stage, delivering a perfectly baked loaf with a golden-brown crust. Remember to consult your recipe for precise ingredient measurements and adjustments.
Whole Wheat Cycle
The Whole Wheat Cycle is specifically designed for breads containing a significant portion of whole wheat flour. This cycle extends the kneading and rising times to accommodate the denser nature of whole wheat, ensuring proper gluten development and a lighter texture. Expect this cycle to run for approximately 3 hours and 50 minutes.
Whole wheat flour absorbs more liquid, so recipes often require adjustments – typically adding 1-2 tablespoons of extra water. Using a combination of whole wheat and bread flour can improve the loaf’s rise and texture. Selecting the correct loaf size remains important. This cycle delivers a nutritious and flavorful loaf, perfect for sandwiches or toast, offering a wholesome alternative to white bread.
French Bread Cycle
The French Bread Cycle is optimized for creating loaves with a crisp crust and a chewy interior, characteristic of traditional French bread. This cycle utilizes a higher initial kneading speed and a longer rise time to develop the necessary gluten structure. Expect a total cycle duration of around 3 hours and 30 minutes.
Recipes for this cycle typically include a higher hydration level (more water) to achieve the desired texture. A slightly lower sugar content is also common. Selecting the appropriate crust color is crucial for achieving the perfect golden-brown crust. This cycle delivers a rustic and flavorful loaf, ideal for dipping in soups or enjoying with cheese and wine.
Sweet Bread Cycle
The Sweet Bread Cycle is specifically designed for enriched doughs containing higher amounts of sugar, fat, and eggs. This cycle features a slower kneading speed and a longer rise time to accommodate these ingredients, ensuring proper development and a tender crumb. Expect a cycle duration of approximately 3 hours.
Recipes utilizing this cycle include brioche, challah, and cinnamon swirl bread. It’s important to add liquid ingredients at room temperature for optimal results. Selecting a lighter crust color prevents over-browning due to the higher sugar content. This cycle produces soft, flavorful loaves perfect for breakfast, desserts, or French toast.
Dough Cycle
The Dough Cycle allows you to prepare dough for baking in a conventional oven or for other uses like rolls or pizza. This cycle completes the kneading and first rise, then automatically stops, leaving you with perfectly proofed dough. The cycle duration typically ranges from 1 hour and 30 minutes to 2 hours.
After the cycle finishes, gently remove the dough and shape it as desired. For best results, use bread flour with a higher protein content. Avoid adding sugar or fat directly into the bread pan; instead, incorporate them during the shaping process. This cycle provides a convenient starting point for various baked goods.
Jam Cycle
The Jam Cycle enables you to create delicious homemade jams and preserves directly within your bread machine. This cycle typically lasts around 1 hour and 15 minutes, providing sufficient time for the fruit and sugar to cook down into a spreadable consistency. Ensure you use a recipe specifically designed for bread machine jam making, as ingredient ratios are crucial for proper setting.
Always use fresh or frozen fruit, and adjust sugar levels according to your preference and the fruit’s natural sweetness. Stir the mixture occasionally during the cycle for even cooking. Allow the jam to cool completely before storing it in sterilized jars.
Cake Cycle
The Cake Cycle allows you to bake simple cakes directly in your bread machine pan. This cycle generally runs for approximately 1 hour and 30 minutes, providing enough time for the cake batter to rise and bake through. It’s best suited for denser cake varieties like pound cake or banana bread, rather than light and airy sponge cakes.
Ensure all ingredients are at room temperature for optimal mixing and baking; Grease the bread machine pan thoroughly to prevent sticking. Avoid opening the lid during the baking process, as this can cause the cake to collapse. Let the cake cool completely before removing it from the pan.

Advanced Features & Troubleshooting
Explore delay timers, keep-warm functions, and crust control. This section also provides solutions for common error codes and bread-making issues.
Delay Timer Function
The Delay Timer allows you to conveniently schedule bread baking in advance. This feature is perfect for enjoying fresh bread in the morning or when you return home. To utilize this function, first add all ingredients to the bread pan, ensuring proper order as outlined in your recipe. Select the desired bread cycle, then press the ‘Delay Timer’ button.
Use the hour and minute buttons to set the desired delay time – remember this is the time until baking begins, not the completion time. Once set, press the ‘Start’ button. The display will show the delayed start time. Important: Avoid using perishable ingredients like milk or eggs when utilizing a long delay, as they may spoil. Always double-check the set time before initiating the delay function for optimal results.
Keep Warm Function
The Keep Warm function is designed to maintain your freshly baked bread at an optimal temperature after the baking cycle completes. This prevents the bread from cooling down too quickly and becoming stale. Once the baking cycle finishes, the bread machine automatically switches to the Keep Warm mode, typically lasting for up to one hour.
During this period, the heating element cycles on and off to preserve warmth. To disable the Keep Warm function, simply press the ‘Start/Stop’ button. It’s important to note that prolonged use of the Keep Warm function can slightly dry out the crust. For best results, remove the bread promptly after the cycle ends or within the Keep Warm timeframe.
Crust Control Settings
The Black & Decker bread machine offers adjustable crust control settings, allowing you to customize the darkness of your bread’s crust. Typically, there are three options: Light, Medium, and Dark. Selecting a darker setting results in a more deeply browned and crispier crust, while a lighter setting produces a paler, softer crust.
To adjust the crust color, use the ‘Crust Color’ button before starting the baking cycle. The selected crust level will be displayed on the machine’s control panel. Experimenting with different settings helps you achieve your preferred crust texture and appearance. Remember that humidity and ingredient variations can slightly affect the final crust color.
Common Error Codes & Solutions
If your Black & Decker bread machine displays an error code, consult the manual for specific troubleshooting steps. A common error, “Err 1,” often indicates a power interruption during the cycle; simply restart the machine. “Err 2” might suggest a faulty temperature sensor, requiring service. “Err 3” could mean the kneading blade is obstructed – turn off, unplug, and carefully check for obstructions.
Before contacting customer support, ensure the machine is properly plugged in and the lid is securely closed. Resetting the machine by unplugging it for a few minutes can sometimes resolve minor errors. Always refer to the manual’s dedicated error code section for detailed guidance.
Troubleshooting Common Bread Issues (Dense, Collapsed, etc.)
Dense bread often results from insufficient yeast, improper ingredient measurement, or using expired yeast. Ensure accurate measurements and fresh ingredients. Collapsed loaves can stem from excessive liquid, too much yeast, or interrupting the cycle prematurely; A sunken center might indicate insufficient gluten development – try a longer kneading time or higher protein flour.
If the bread is pale, increase the sugar slightly. For uneven baking, rotate the loaf pan halfway through the cycle. Always consult the manual’s troubleshooting section for specific remedies related to your Black & Decker model.

Maintenance & Care

Regular cleaning extends the life of your machine. Unplug before cleaning, and wipe down all surfaces. Replace worn parts as needed for optimal performance.
Cleaning Procedures
Before any cleaning, always ensure the bread machine is unplugged and completely cooled. The baking pan and kneading blade are typically non-stick coated and should be hand-washed with warm, soapy water. Avoid abrasive cleaners or scouring pads, as these can damage the coating.
The exterior of the machine can be wiped down with a damp cloth. Do not immerse the main unit in water or any other liquid. For stubborn residue inside the bread machine, a slightly damp cloth can be used, ensuring no water enters the electrical components.
Thoroughly dry all parts before reassembling. Regular cleaning prevents buildup and ensures optimal performance and longevity of your Black & Decker bread machine. Inspect the heating element periodically for crumbs and gently remove them.
Storage Instructions
When storing your Black & Decker bread machine, ensure it is completely clean and dry to prevent mold or odors. Store the machine in a cool, dry place, away from direct sunlight and extreme temperatures. It’s best to store it in its original packaging if available, or a similar protective container.
Avoid storing heavy items on top of the bread machine, as this could potentially damage the exterior or internal components. Keep the power cord neatly coiled and stored alongside the machine, preventing tangling or damage.
Regularly check the storage area for pests. Proper storage extends the lifespan of your appliance and ensures it’s ready for use whenever you need it.
Replacing Wear Parts
Over time, certain parts of your Black & Decker bread machine may require replacement to maintain optimal performance. The kneading paddle is a common wear item, showing signs of wear after extended use. Regularly inspect it for cracks or deformation and replace as needed.
The non-stick coating inside the bread pan can also degrade. If food begins to stick excessively, consider replacing the pan. Contact Black & Decker customer support or authorized retailers for genuine replacement parts.
Always disconnect the machine from the power outlet before attempting any part replacement. Following the manual’s instructions carefully ensures safe and effective repairs, prolonging the life of your bread maker.

Recipes & Inspiration
Explore diverse bread options! From gluten-free loaves to rye and sourdough, this section unlocks culinary creativity with your Black & Decker machine.
Gluten-Free Bread Recipes
Embark on a gluten-free baking journey with your Black & Decker bread machine! This section provides specialized recipes designed for those with dietary restrictions or preferences. Achieving successful gluten-free bread requires a unique blend of flours – rice flour, tapioca starch, and potato starch are commonly used.
Understanding the role of xanthan gum is crucial, as it mimics gluten’s binding properties, providing structure and elasticity. We’ll guide you through recipes for classic gluten-free white bread, flavorful multigrain options, and even sweet gluten-free treats. Detailed instructions ensure optimal results, addressing common challenges like crumbly texture or lack of rise. Experiment with different gluten-free flour blends to discover your perfect loaf!
Specialty Bread Recipes (Rye, Sourdough)
Expand your baking repertoire with exciting specialty breads! This section unlocks the potential of your Black & Decker machine for crafting flavorful rye and sourdough loaves. Rye bread recipes utilize varying percentages of rye flour, impacting density and taste – explore light, medium, and dark rye options.

Sourdough presents a unique challenge, requiring a pre-fermented starter. We’ll provide guidance on maintaining a healthy starter and incorporating it into your bread machine cycle. Detailed recipes cover both traditional and modern sourdough variations. Discover tips for achieving that signature tangy flavor and chewy texture. Experiment with additions like caraway seeds for rye or different hydration levels for sourdough!
Recipe Adjustments & Customization
Unlock your inner baker by mastering recipe adjustments! Your Black & Decker bread machine offers flexibility – don’t be afraid to experiment. Adjusting liquid levels is crucial for dough consistency; add a tablespoon at a time for drier mixes, or reduce for wetter ones. Flour type impacts results; whole wheat requires more liquid than white flour.
Sweetness levels can be tailored to your preference – increase or decrease sugar or honey. Additions like nuts, seeds, or dried fruits should be limited to avoid disrupting the dough’s structure. Remember to account for ingredient weight, not just volume, for consistent outcomes. Keep detailed notes on your modifications to refine your perfect loaf!